This article containing thorough detail, 50 pictures, and 2 HD videos will show you how to remove the headliner for a sweet project like sound deadening, GPS wiring, satellite antenna, or mirror mounted backup cameras.

Removing the headliner in your vehicle is more scary than difficult. In my 2006 4 door Tacoma it took about 1.5 hours the first time and I’d be satisfied removing it in 30 minutes now at a leisurely pace. ( I was also snapping pics and video, so times will vary based on you )
Before we walk through the key steps, know that in my case, sound deadening the naked, thin roof’s metal had a wonderful impact on noise reduction(also softened rain). My purpose was sound deadening, and months earlier, I had already placed a few layers of RAAMmat in all 4 doors and back wall but I really wanted to finish the lid. But it also added another level of sound quality to my JVC Kamelion / Alpine PDX5 system which features a custom sealed subwoofer enclosure made by the well known Mr Marv of my beloved Tacoma World Forum Garage. If you have a vehicle and like to do things yourself, I highly recommend joining(or at least exploring) forums applicable to your vehicle, you’d be amazed at what you can learn and share.

Deadening the roof absolutely changed the sound of my system, and now I have to crawl back and unplug some speakers for some system re-tuning to maximize the effect. Removing the headliner is not too tough, and very worth it. Projects are really easy to bang out once you’ve yanked the top because there is not much on the ceiling to impede your enthusiastic plans.
Key Tools, Tips, and Steps for Removing your Headliner: ( 2006 Toyota Tacoma Specific )
Tools:
- 10mm Socket ( use this over the Phillips head or you may strip factory secured screws which would suck )
- Screwdrivers: Phillips (required for sunglass holders) and Flat(may need for rear coat hangers)
- Your favorite pry tool ( I used the flat head screwdriver with tape on the end to reduce scratching )
6 Tips
- Keep your socket ready as it makes removal the easiest and is the most common tool used in this project.
- Every clip, bracket, socket and other thingies on the roof must come off/out/down to release the Headliner.
- I did NOT remove the B and C Pillars. I ONLY removed the front most A Pillars
- Headliner is a “fairly flexible” fiberglass’ish material. It’s tough and it does safely bend. I gently bent it down and out of the back seat like a hard-shell beef Taco.
- Remember, I posted all of the project pictures(with descriptions) here at Booya Flickr.
- After or before reading the rest of this article I recommend watching both of the related videos to this project. DURING removal and AFTER headliner removal.
1. Starting at the Front of the vehicle, it’s Pillar Time
You can do the pillars first, or the sun visors and clips. Both are straightforward and I found the order doesn’t matter. Gently pry off the 2 socket covers on both A Pillars. Grab your 10mm socket and remove the screws. Once they’re out, the pillar’s cover comes off by tugging on the spots where you can grab it and I just kind of “wiggle-pull”. Actually quite easy but as usual, use confident care when removing the final body of the A pillar exposing the guts. I did not remove the seatbealt pillars in the middle or back. You may have to depending on your vehicle year,make,model of course.
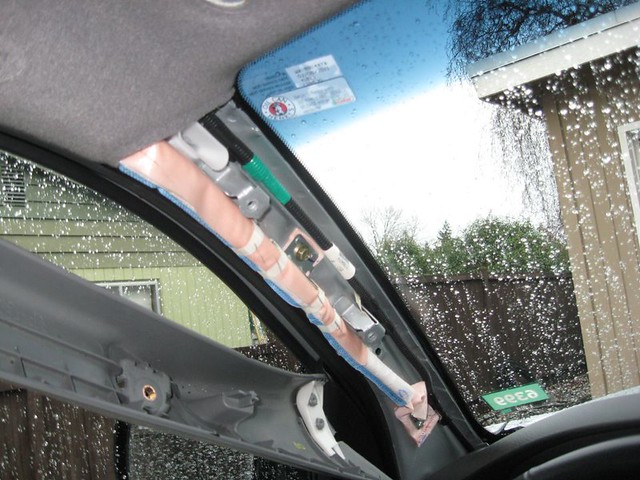
2. Still At the Front Remove Sun Visors and receiving clips.
I started at the front by removing both the left and right sun visors. This is a phillips head screwdriver job. Quick in Easy. The “receving-clips” for the visors are a 1/4 counter clockwise turn and tug out. The “Mystery Clips” by the head of driver and passenger in the front should also be unscrewed real quickly here with your 10mm socket. I think these clips are simply for bracing the Headliner. Regardless, be careful. They open downwards and the cover and body are held together with a little tiny thin hinge and I broke one. So, open these clips slowly after easily pressing on the top with your flat head screwdriver ( or similar tool ).
2b. *repeating step* “Shimmy” The Headliner out of the Weather Seal and Pillars
There is an implied step that happens above the windows and Seat belt Pillars. As you work your way back you will need to shake n wiggle the headliner out of the Weather Seal around the windows and out of the Pillars as you work your way back. This technique is how I was able to remove the lid without removing the mid and back pillars. Working back ( re-installing ) you can “shimmy” the headliner back into Pillar grooves and weather seal inch by inch with your fingertips! I just ‘walked it’ with my fingers back into the grooves/slots. Take your time, create a system as you have to do it on all your windows, in my case 4. It will fit, it will work. If you have problems you can simply remove the pillars, but it’s an extra pain in my opinion.
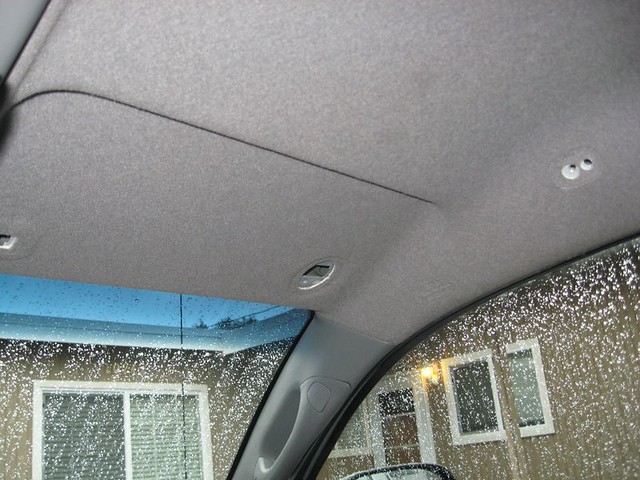
3. Time to pull the Overhead Console.. No biggie.
Here are the 20 seconds of fame for your phillips head screwdriver. The first of this multi-step process is to open the sunglass holder, take out your kick-ass shades and remove the single screw in the middle of it. It’s a small screw, so like everything else, make sure to keep your removed-screws organized. At the very back of the console there are 3 “claws” these will come out last and go in first. There’s no clips or springs on the back, just 3 “fingers” that brace the back of the ceiling console. If you can’t get enough access, then see step 2b, and work the headliner out of the weather seal and pillars further back.
On the front, there are 2 spikes that “lock” into the roof braces using metal spring clips that attach to the top of them. Pull straight down on the very front(windshield) side of the console, these will successfully release the spring clips, naturally releasing the back and this will move us to the middle of the vehicle. Yes, to remove the overhead console you unscrew 1 screw, and then pull down on the front edge to remove the spring clips.
CAUTION: When removing the front of the overhead console, watch and listen for the spring clips that rest on the top of the 2 spikes that connect to the roof’s frame bars. 1 of mine got stuck in the front bars as they can easily slip off during de-installation. Don’t lose ‘em!
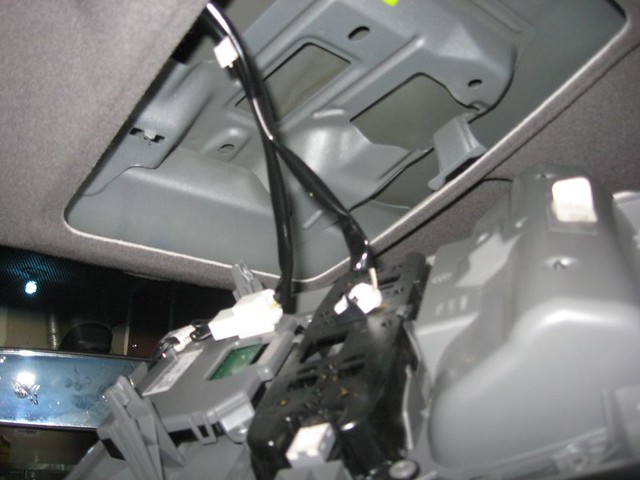
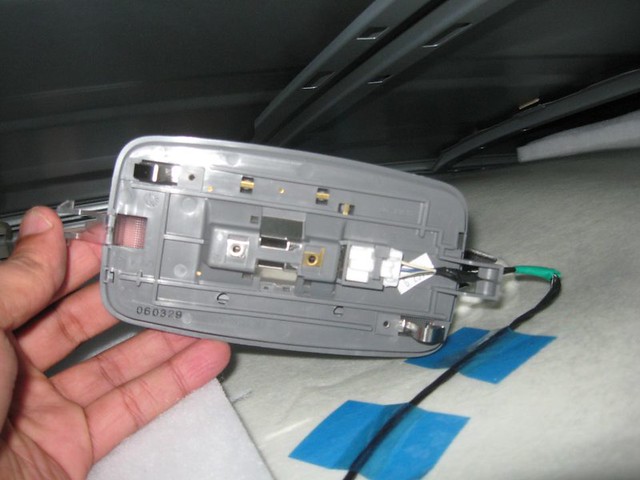
4. Yank the Dome Light
At this point, you’re at the midway spot in your truck. You will now notice that the dome light has some cables taped to the headliner with fairly sticky blue tape. I just went through and simply unsecured the tape. I wouldn’t try to preserve the tape, just replace it if you feel the need. I did not, but there was enough tape left on the cables to hold it in place. If you’re thorough, then securely retape the cables upon re-install of the lid.
Now you can reach in and detach the light. There are 2 spring clips in either corner that secure the light to a roof support bar, you can bend down the headliner and look to see the Pinch and Pull Down clips. Once you’ve done that, you can see the last steps of light removal yourself. You’ve removed the light from the roof, but if is still attached to the headliner. I just “gently but firmly” bent the plastic front clip down and out and then removed the light from the headliner as you need to as well.
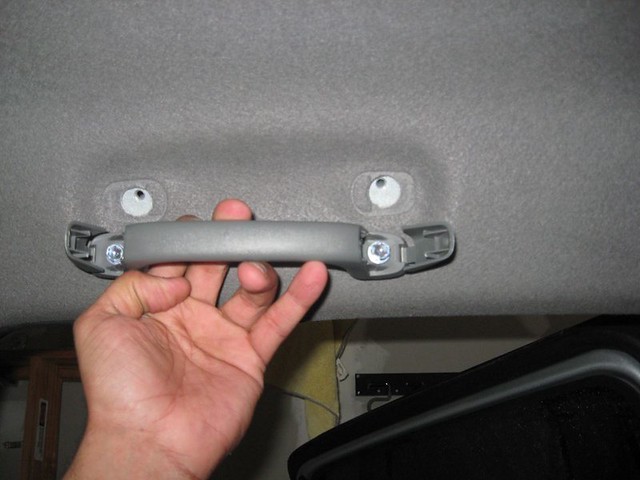
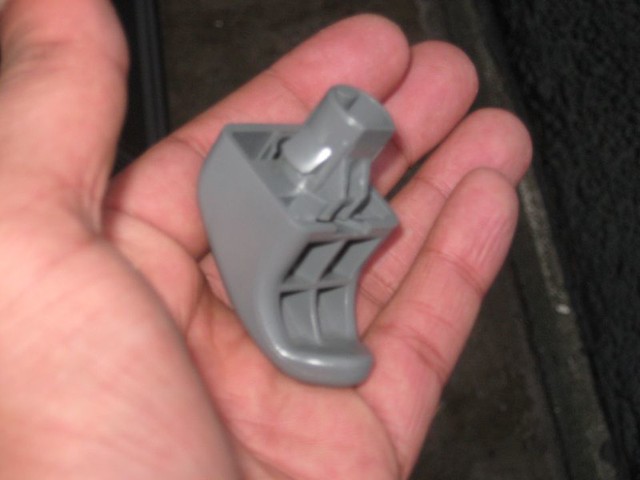
5. Rear Oh Shi* Handles
Just like the front A Pillar Handles the Passenger version comes off just as easy. You can pinch the socket covers to expose the screw, jam the 10mm socket in there and bang this step out in 2-4 minutes. Easy step, and remember, keep your screws organized !
6. Rear Coat Hanger Clips
This step is also a quick one. These clips are 1/4 counter clockwise turn. You may need to lightly press inside the “top” of the hooks, and depress before turning to release the clip. If it doesn’t turn easy, then depress inside the hole on top of the hook and then twist. It will go easily once it’s unlocked. No more than 5 minutes here, if longer then review the pics and video for this part.
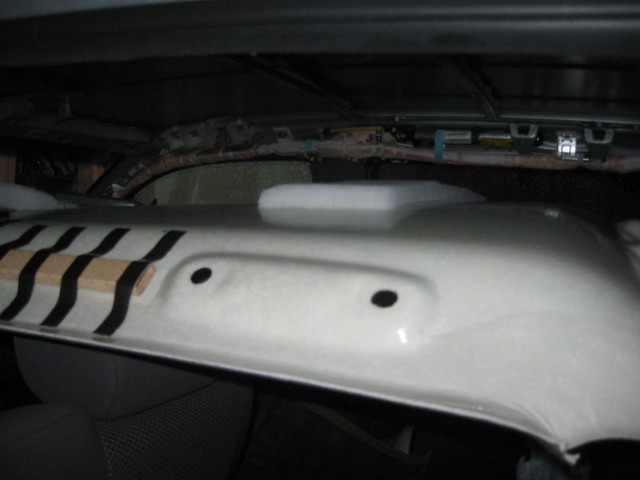
7. Roof is falling
At this point, you don’t need this article much because the Headliner should be falling on your head. To remove it, I folded the driver’s seat all the way down, and folded the headliner out like a beef Taco. It was out in 30 seconds, so there’s your metric and approach for final removal.
“Headliner is down, ready to “upside down Taco Style Fold” Out the back”
8. Re-Install Back to Front
Now that your lid is full on naked, you should be able to bang out your project very quickly and easily whether it is Sound Deadening with RAAMmat or GPS/Satellite/Camera wiring mods. When you’re done, go back to front. Go methodically clip by clip, and don’t go too far too fast, because you will need a little slack to re-insert the headliner into the weather seal’s and pillar grooves.
Final Booya Tip:
We can discuss specifics for a Toyota Tacoma here, but I highly recommend that you visit/search/join the Tacoma World Forum (or the forum for the vehicle you drive) if you want other writeups, pics, and most importantly a lot of enthusiastic and smart Taco Owners. Most likely if you’re willing to remove your headliner, you have a lot of other projects you want to do as well. Once you go mods, you never go back. It’s fun and can save you thousands of dollars. ( but also risky sometimes so consult your owner’s manual)
*** Here is this topic discussed at the Tacoma World Forum. Recommended visit **
Below are 2 Key videos to watch. I recommend watching them if you’re looking to do this exact project it will help you get a visual.
Part 1: Detail walkthrough the day after project completion
Part 2: Visual Walkthrough with the Headliner Off
This is a project you can do, good luck !